Mimicking Nature | Hügelkulture
In an undisturbed forest, on the floor, there’s years of accumulated organic matter — logs decomposing, branches, leaves — and the rich humus below. Just the habitat worms like!
Mycelium can thrive in this environment, connecting roots of trees through an incredible network of threads that break down compounds and move nutrients around as the forest needs them. The mushroom part we are familiar with is the fruiting body that appears above all this wonderful activity below the soil surface.
How a High School and Community Garden Partnership Started a Productive Growing Space in Hard-Packed Soil, Using Hügelkultur to Regenerate Soil
Hügelkultur is all about working with nature, not against it. The idea comes from the way forests naturally build their own soil over time. Imagine stepping into a dense, old-growth forest—the ground beneath you feels soft, spongy, and full of life. That’s because, for decades (or even hundreds of years), fallen logs, leaves, and branches have been left undisturbed, slowly breaking down into rich, nutrient-dense humus.
Beneath all those layers of pine needles and leaves, there’s a ton of microbial activity happening. The soil holds onto moisture, is teeming with worms, and—if you look closely—has mycelia running through it. Mycelia are the white, thread-like structures of fungi that connect plant roots, help break down organic matter, and even transfer nutrients between trees in a healthy ecosystem.
It’s a sign of an active, thriving soil system—one that can sustain itself without constant human intervention.
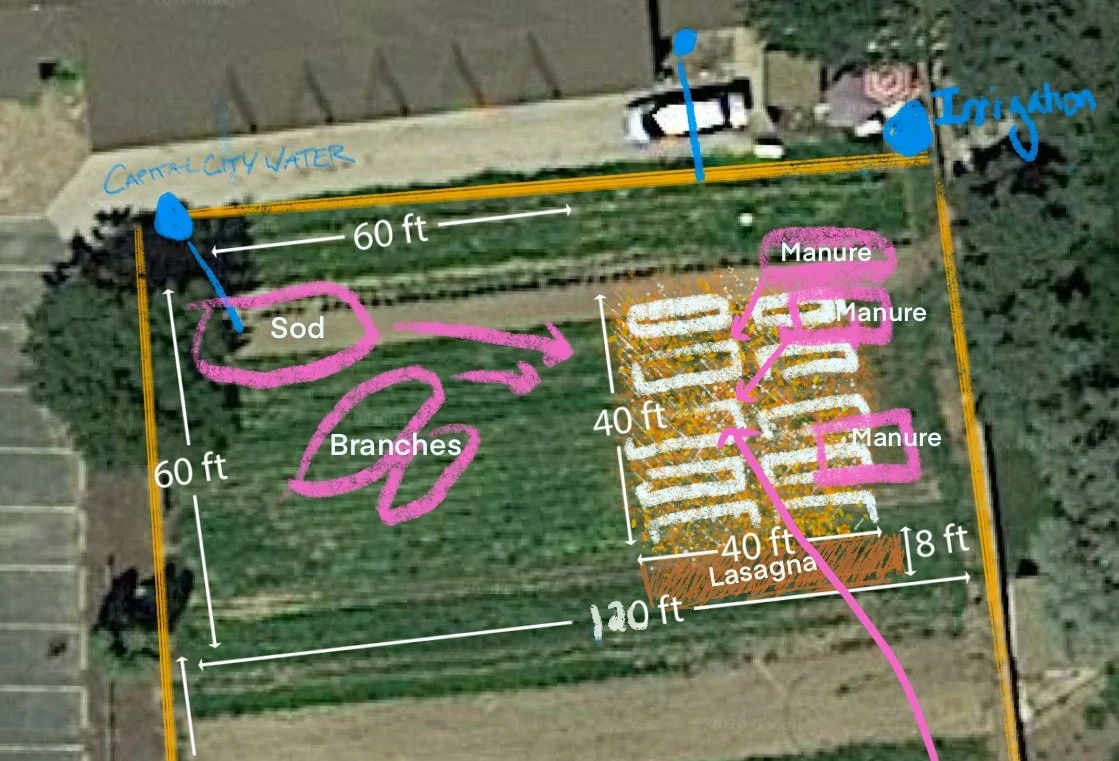
Year 1 - Setting up the rows, planning for a wood chips drop, pruned branches and leaves from friends in the landscaping and garden-counsulting businesses.
That’s what we aimed to replicate in our garden with Hügel rows—raised garden beds built on a foundation of decomposing wood and organic matter, providing long-term fertility, better moisture retention, and healthier plants.
The soil of a farm or garden in our region, that has been tilled yearly for ease-of-use, can result in hard-packed soil. Many plants (aka weeds) like chicory and dandelions often show up in these spaces because they have deep tap roots (these two plants actually have beneficial nutrients and can be utilized in the garden… and eaten!). Plant-growth/weed-growth is Nature’s way of slowly getting the soil back to a preferred consistency. Bindweed (aka Morning Glory, or, the boa constrictor of the garden) also thrives in this environment. It’s doing the job of breaking up hard packed soil, AND covering the soil surface with millions of leaves on it’s vines, providing the shade the soil needs for some life to grow. This plant is not native to our region, but thrives here and around the U.S. It can grow via root or seed, making it a Rhizomatous plant - one that can grow a whole new plant from a root segment as short as 1 inch. So, no matter how much a field or garden is tilled, it will come back.
Transplanting new plants—like a treasured tomato seedling, into soil that hasn’t been loosened and enriched with nutrients — sets the plant up for failure, giving it’s roots nowhere to grow.
Here’s how we built our first Hügel rows.
Marking and Digging the Rows
We started by:
Marking out four rows with sticks.
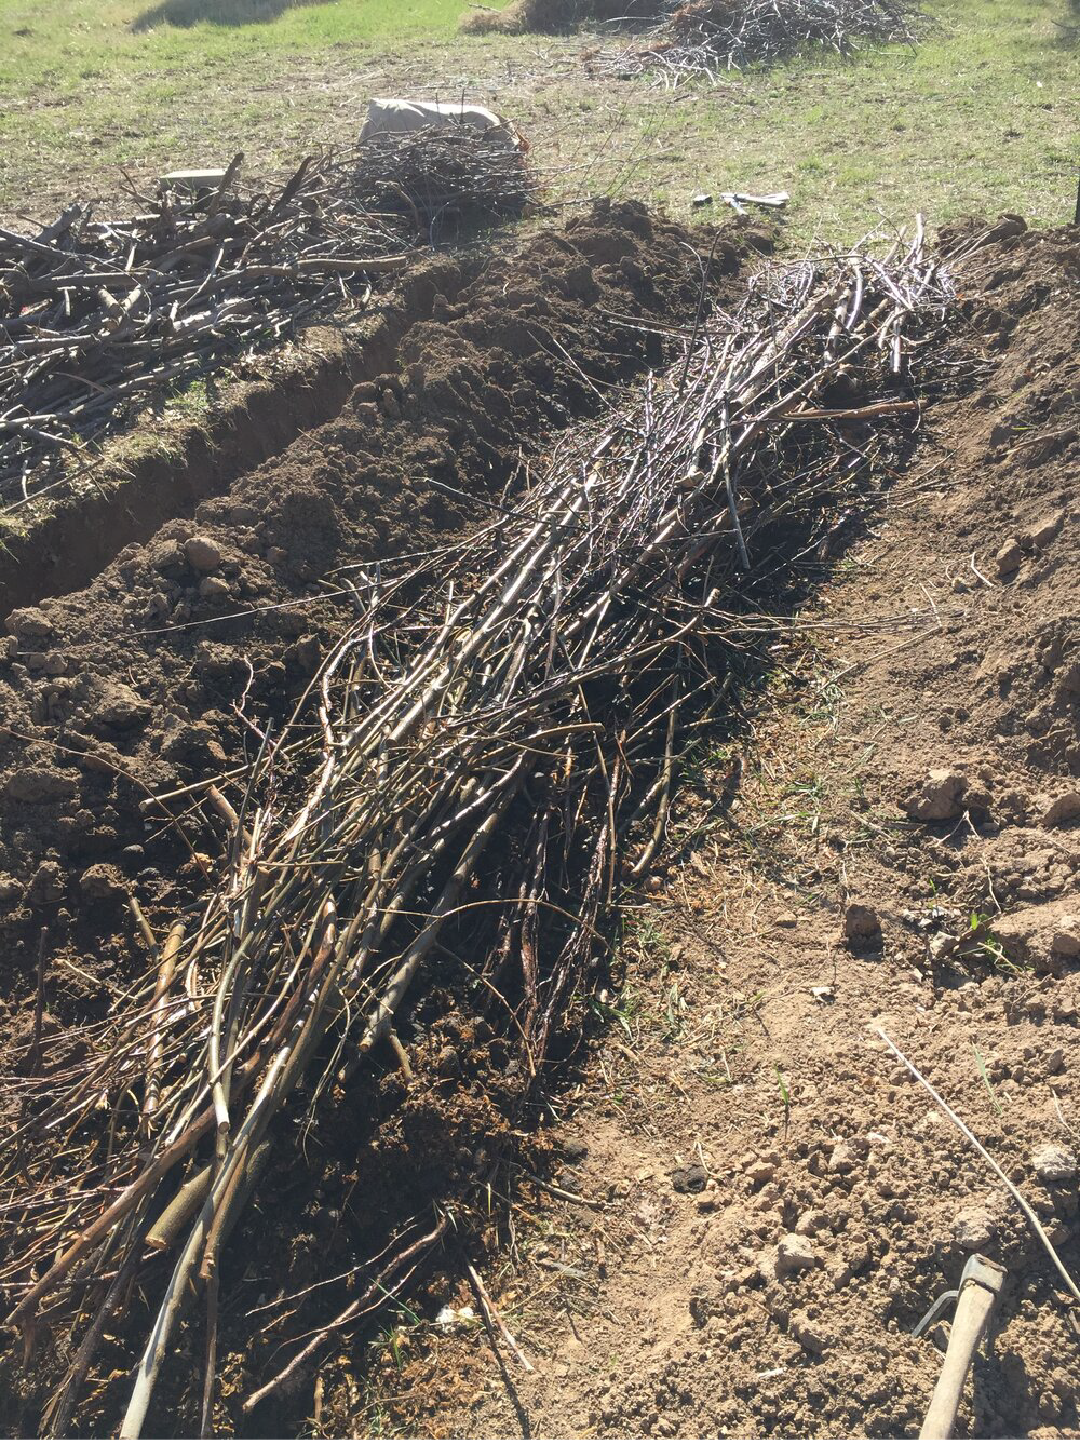
Digging trenches roughly 2 feet wide and 1 foot deep to create a solid base for layering materials.
Setting aside the top 6 inches of soil to be used later in the final layering process.
This gave us a controlled space to work with while ensuring the decomposition process happened efficiently below the surface.
Breaking ground year 1, with educator/garden champions Teal and Ben.
First cohort from One Stone High School gathered to start layering in logs and branches in the first hügel row. Note that this was one of the first meet-ups as our region was coming out of the COVID lockdown. We wore masks for safety the first 2 or 3 meet ups.
We procured branches and logs of varied sizes from landscapers who dropped them at the garden-site early on. Our first meetings involved a lot of breaking these down and sorting them by size and type.
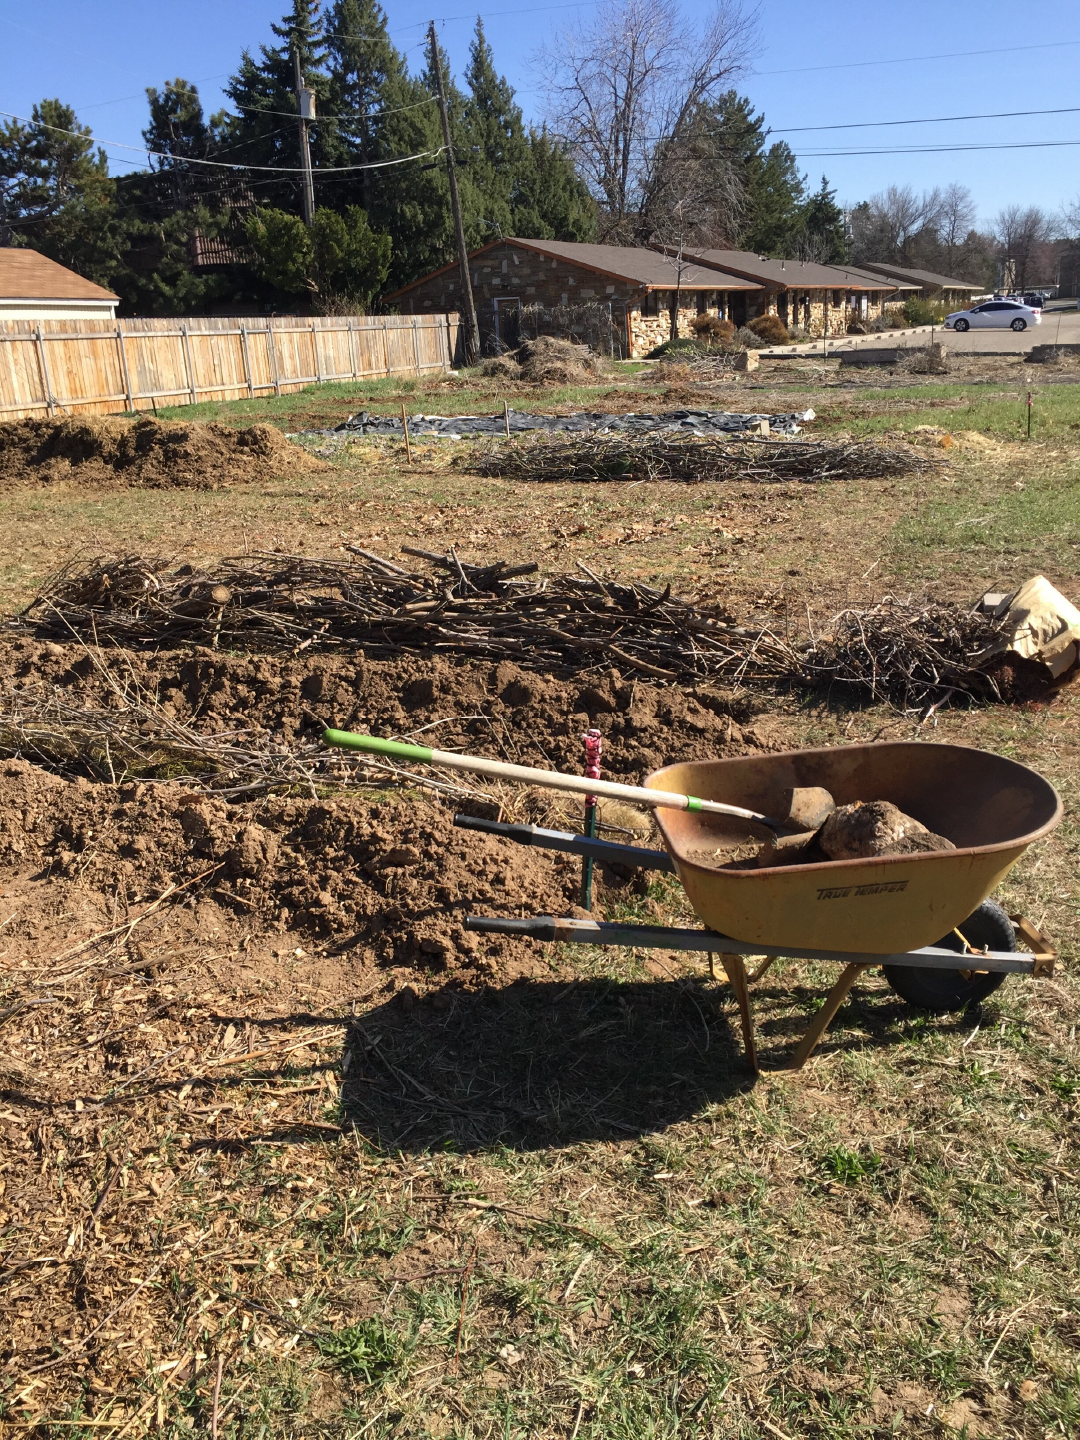
We constructed 10 rows our first season. In the background you can see a silage tarp functioning as an experiment to kill the bindweed with heat! It did not work for the long term, but gave us a little bit of a head start.
Layering the Hügel Row – Building from the Bottom Up
To get the most out of this method, we stacked materials strategically, starting with large, slow-decomposing items and working up to finer, quicker-decomposing materials.
Base Layers: Long-Term Structure & Carbon Source
Decomposing Weeds and Large Branches
The first layer consisted of thick, decomposing weeds to provide a dense organic base.
We stacked large branches and logs next, ensuring plenty of air pockets to prevent compaction and allow for slow decomposition.
Avoided: Black walnut, hickory, and locust wood, which can inhibit plant growth.
Manure for Nitrogen Balance
A generous layer of aged manure was added to help offset the nitrogen depletion caused by breaking down wood.
Leaves for Organic Matter
We layered in oak and maple leaves, avoiding any from black walnut, hickory, or leaves treated with herbicides like Roundup.
These leaves helped retain moisture and encourage microbial activity.
Smaller Branches and Wood Chips
These went on next, building out the structure of the row while adding more slow-release organic material.
Since wood chips can absorb nitrogen as they break down, we added extra manure to balance things out.
Middle Layers: Nutrient Boost & Moisture Retention
Sod and Grass Clippings (Only If Herbicide-Free!)
We used untreated sod from our site, placing it deep in the mound to build mass while keeping it away from the planting surface.
Only grass clippings that hadn’t been sprayed with herbicides or synthetic fertilizers were incorporated.
Aged Manure for Additional Fertility
Another layer of manure went in to keep feeding the decomposers in the soil.
Small Branches, More Leaves, and Non-Seedy Grass Clippings
These materials were tucked into gaps between larger pieces to keep the mound solid while encouraging microbial breakdown.
Mushroom Substrate for Soil Biodiversity
This is where things got exciting—we added spent mushroom blocks into the row.
Mushroom substrate introduced mycelia, which helped break down materials, cycle nutrients, and create a healthy fungal network in the soil.
If you’ve ever peeled back a decaying log and seen those white, web-like threads—that’s mycelia at work! It’s a sign of good, living soil, and we wanted that in our rows.
Pro Tip: Some local farmers sell spent mushroom substrate—often for around $100 per load—which is well worth incorporating if you’re serious about soil health.
Final Layers: Sealing & Prepping for Planting
Compressing and Watering
We walked carefully over the mound to compress it while still maintaining airflow.
Then, we gave it a deep soak with the hose to jumpstart decomposition.
Top Soil and Manure Layer
The final soil layer was a mix of equal parts soil and manure, spread evenly to create a stable planting surface.
We aimed for 4-12 inches of soil to lock in moisture and protect the layers below.
Final Mulch Cover
To finish, we covered everything with leaves and straw for insulation and moisture retention.
A light misting of water helped settle it in place.
Seasonal Maintenance – Keeping the Hügel Row Thriving
Hügelkultur isn’t a one-and-done project—it keeps improving over time as the materials decompose. To keep it working at its best, we:
In Fall: Added a thin layer of aged manure to insulate the mound for winter.
In Spring: If we hadn’t added manure in the fall, we applied a light layer of compost and let it settle for at least a month before planting.
What We Gained from This Process
After completing our first Hügel rows, we had a rich, moisture-retentive, nutrient-dense planting area that would continue to feed our plants for years to come. In our first season we harvested between 250-300 lb of tomatoes!
This method didn’t just save us on soil costs—it actively built better soil by mimicking the natural processes of a forest floor. The mycelial networks, decomposing wood, and organic layers worked together to create an environment where plants could thrive with less watering, fewer inputs, and more resilience against extreme weather.
Our goal was to complete 10 rows, ensuring a self-sustaining system for long-term soil health and food production.
In Season 1 we harvested between 250-300 lbs of tomatoes. In Season 2 we continued to enjoy lush growth, rotating crops. Shown here: kale of various types, collard greens, tomatillos, and sorghum.
Have you tried building a Hügel bed before? Let’s swap tips and experiences in the comments!


